
Written by Chris Hailey – Underwater Videographer and PADI Regional Manager of New Zealand & Fiji
Do you own an action camera but somehow still can’t capture the perfect underwater photo? Or are you an aspiring underwater photographer wanting to learn all the tips and tricks to get started? Whether you are a beginner or an experienced underwater photographer, here are a seven helpful ways to get more out of your action camera!
Correct Camera Settings
When planning your dive, there are a few things to take into account with your camera settings especially if you can’t change them underwater. Before your dive, set your camera to the optimal settings, relevant to what you want to shoot underwater.
Frames Per Second (FPS)- The most common FPS are 30, 60, 90, 120, 240, while the less frames your camera is shooting per second the more light you will be letting into the sensor. The benefits of higher frames per second is the ability to use slow motion to slow your footage down to 50%, 25% and in some cases to 10%. This means you will have the ability to slow down your epic shot of a shark. When handheld, it’s great to use slow motion to take out the ‘shake’ that is unavoidable to a handheld shot. However, if you set your FPS too high you will end up with graining footage due to the camera needing to increase the Image Sensitivity Optimisation (ISO) to allow more light into the footage.
Image Sensitivity Optimisation (ISO)- Keeping your ISO low is key to capturing nice and crisp footage. Whereas the higher the ISO, the grainier your shots will become while also losing the ability to slow down your footage.
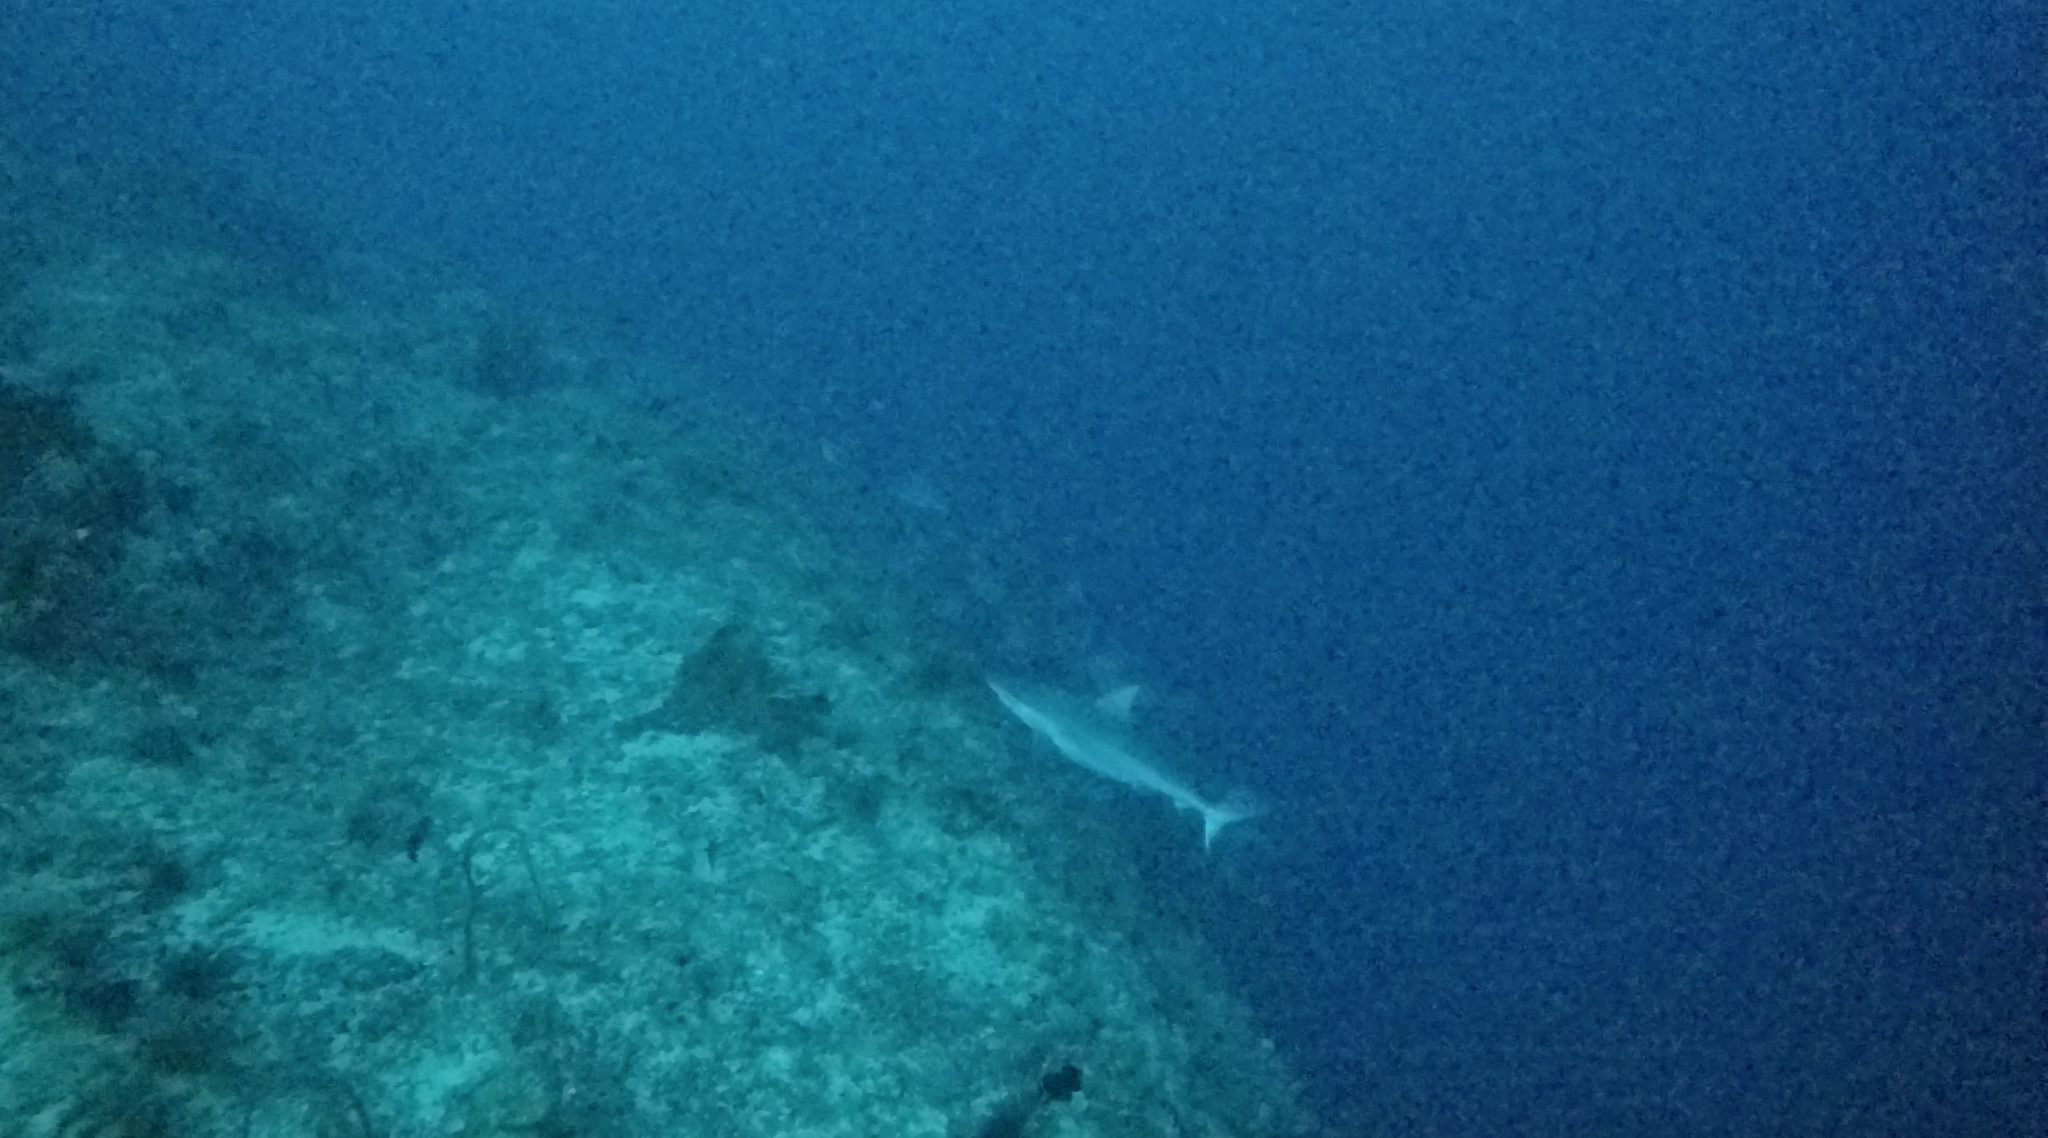
Above is a screen shot of footage shot with a red filter at 30 meter depth (20-30 meter visibility) at ISO 6400. As you can see the high ISO has made the footage unwatchable.
Aspect ratio- Refers to how much of the footage you want your audience to see. The common aspect ratio for shooting is 16:9. Whereas, if you would like the audience to see more of the footage you can shoot in a 4:3 aspect ratio. However, this might give you black lines down the edges of the footage when played back on social media.
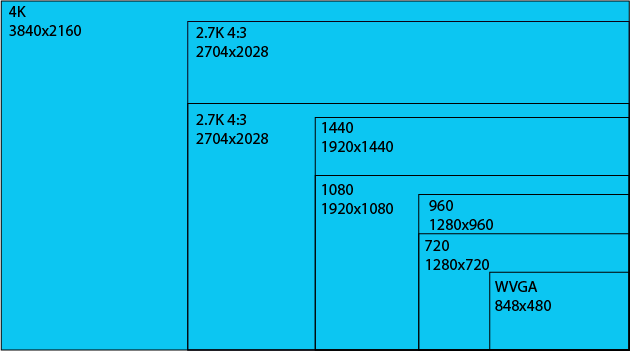
Resolution- Shooting in 4k is awesome right!? But can your editing, TV, Social Media or even your memory card handle the high resolution? As most people are watching your videos through Social Media on their phones or computers you don’t always need to shoot in 4k. However, the benefits of 4k include the ability to crop footage and still maintain a high resolution while having more detail in your shots. However, this can result in less FPS, larger file sizes and needing a high end, high capacity computer to edit the footage. Personally If I am just filming footage to post on Social Media, I find 1080 is enough for high resolution, disk space and to ensure smooth editing.
Buoyancy, Buoyancy, Buoyancy!
I can’t stress this enough! If your buoyancy is amateur then your footage will be too. Without a full understanding of buoyancy and trim you won’t be able to control your shots or capture steady footage. But how do we get good buoyancy while focusing on a task? Check out these easy tips:
- Take the PADI Advanced Open Water Diver course and even incorporate the PADI Peak Performance Buoyancy Specialty course and the PADI Underwater Videographer Specialty course.
- Take the PADI Peak Performance Buoyancy Specialty course.
- Take the PADI Underwater Videographer Specialty course.
- Weight yourself for horizontal trim.
- Stay slow, use frog kicks and learn to back fin.
- Practice in the pool and in shallow water.
- Control your breathing- Yoga might even help!
Tell Your Underwater Story
Your aim while shooting should always be to tell a story using clips from both the surface, underwater or sky (if you have a drone)! Take short clips throughout the day and if you have specific shots you want to capture, then write yourself a timeline on a dive slate. Here is a basic activity list I used when I first started shooting:
- Gear Packing
- Travel
- Arrival Boat Launching
- Gear Set up
- Boat Briefings
- Boat Travel
- Dive Site Briefings and Entry
- Diving – This is where the majority of the footage should be shot!
- Exit
- Travel back
- Night time activities
You should be looking to shoot between 9-12 second clips of each of these activities and from a few different angles, to keep the audience entertained. There is nothing worse than watching a whole dive video from someone’s head-mount with 45mins of bubbles with shaky footage!
Colour!
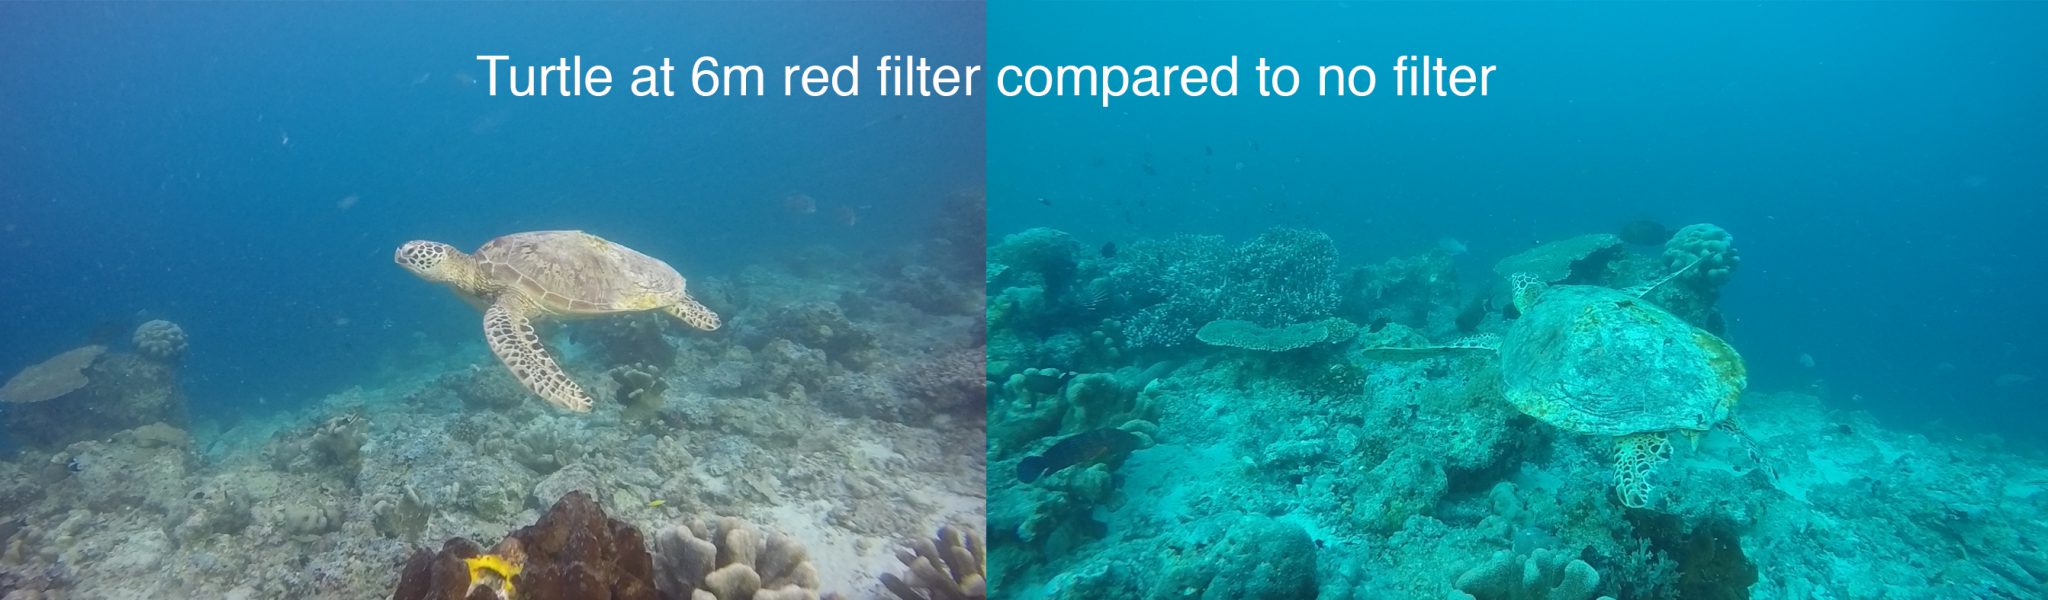
Filters- You have a few options for filters and they all have their benefits. As we know from the PADI Open Water Diver course, red is the first colour we lose underwater. Having a red filter on your camera can do wonders in the shallow water for the colour while also making deeper shots easier to colour correct in the editing process. However, the light needing to pass through the filter can be another limiting factor to producing good footage. The deeper you are, the less light and therefore, the grainier the footage will come out. My recommendation is to use red filters at shallow depths and to take it off when you start to lose light. Make sure to also keep your FPS as low as possible to allow the extra light into the sensor.
Video Lights- Are great for highlighting smaller objects while also adding great colour at depth. Video lights create a contrast between objects close to you and the blue ocean behind them. However, you will need to be close to what you are shooting and you will need to have enough coverage to not get any hot spots of bright light in the footage. Try using more than one light to minimise this risk.
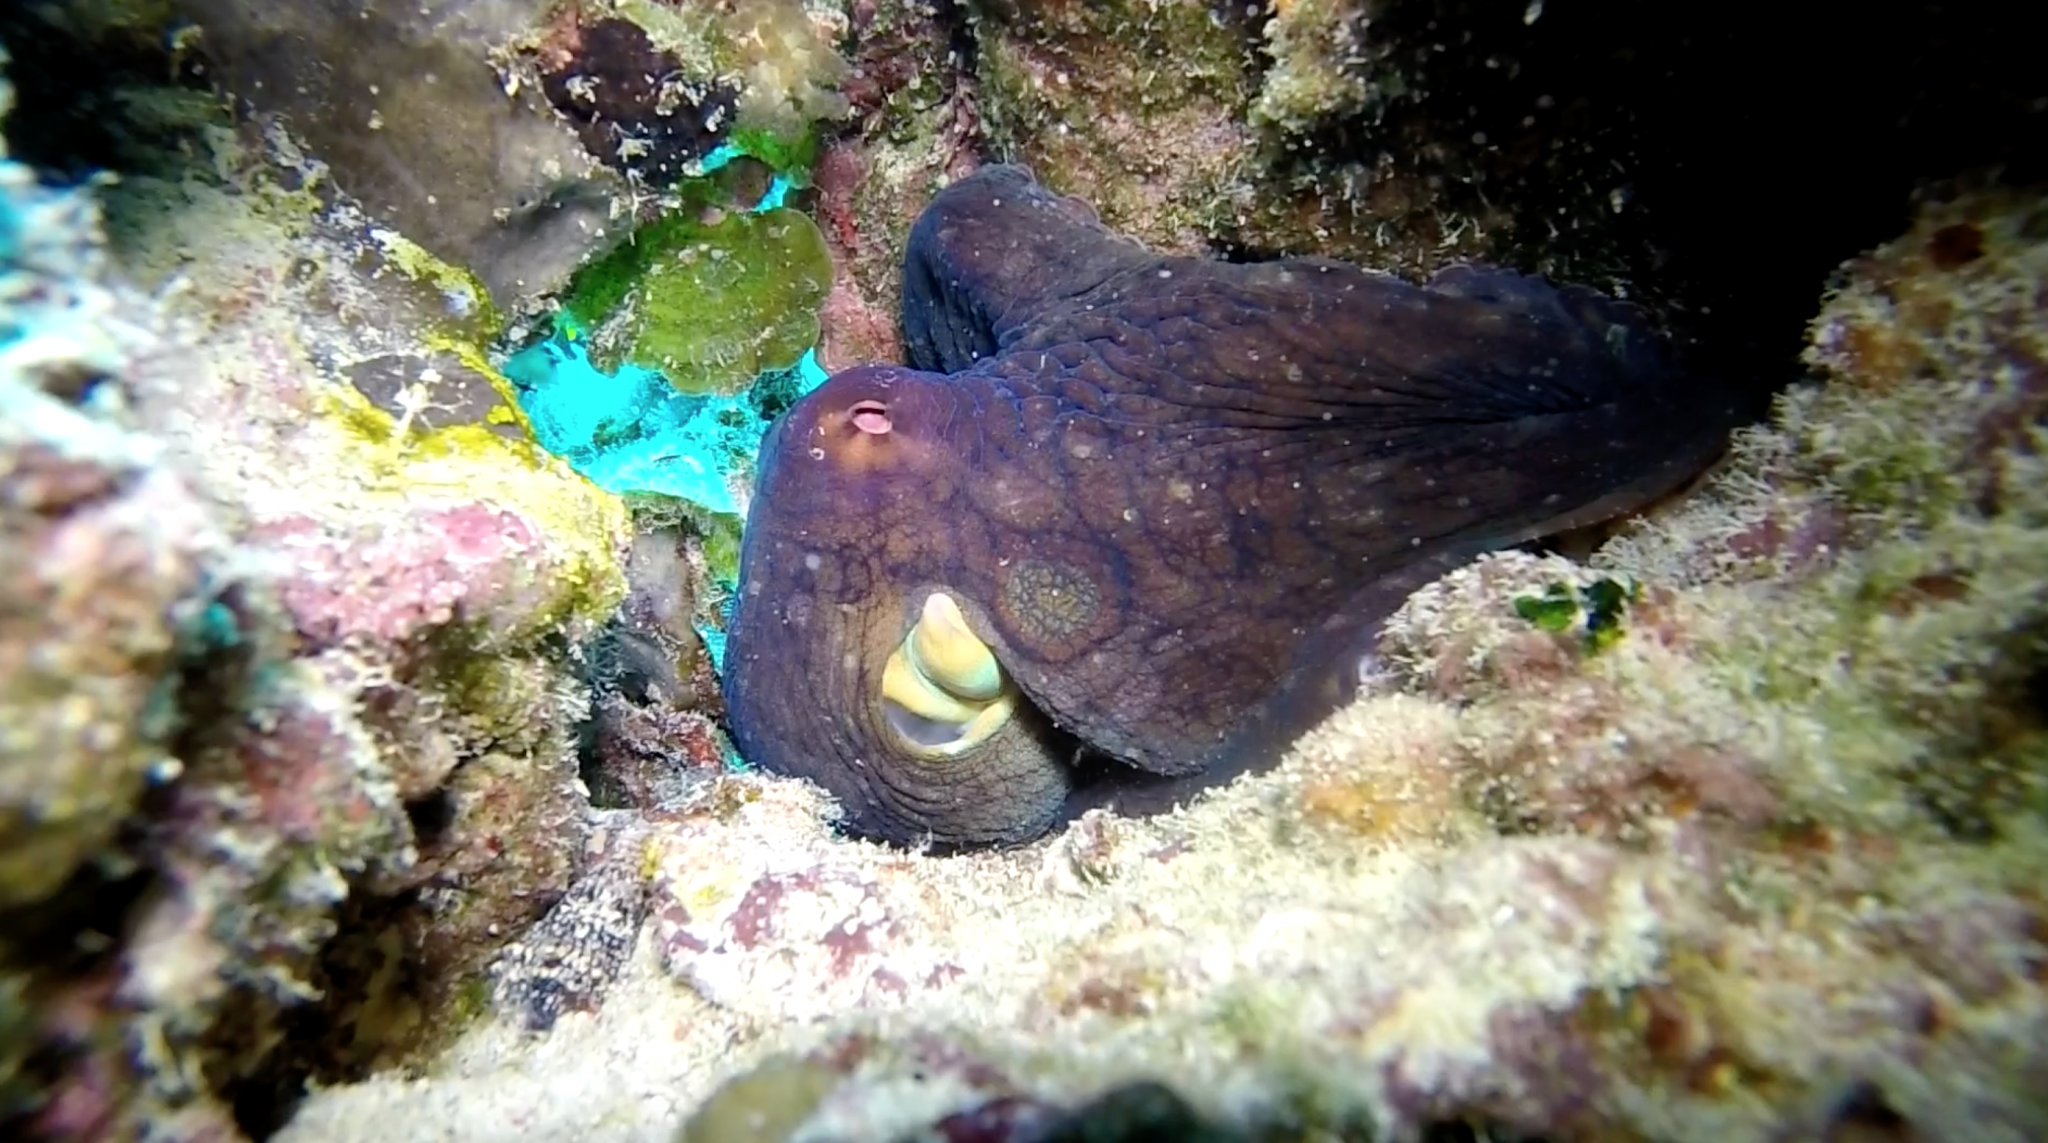
Above is a screen shot from a clip of an octopus lit up with a 1000 lumen video light. Without the light the octopus would have been shrouded in shadow so the camera would have needed to increase the ISO to compensate.
Natural Light- Is great for allowing light into the sensor and good for shooting at depth. Natural light will allow the footage to be blue while still showing the contrast of the marine life against the sun and blue waters.
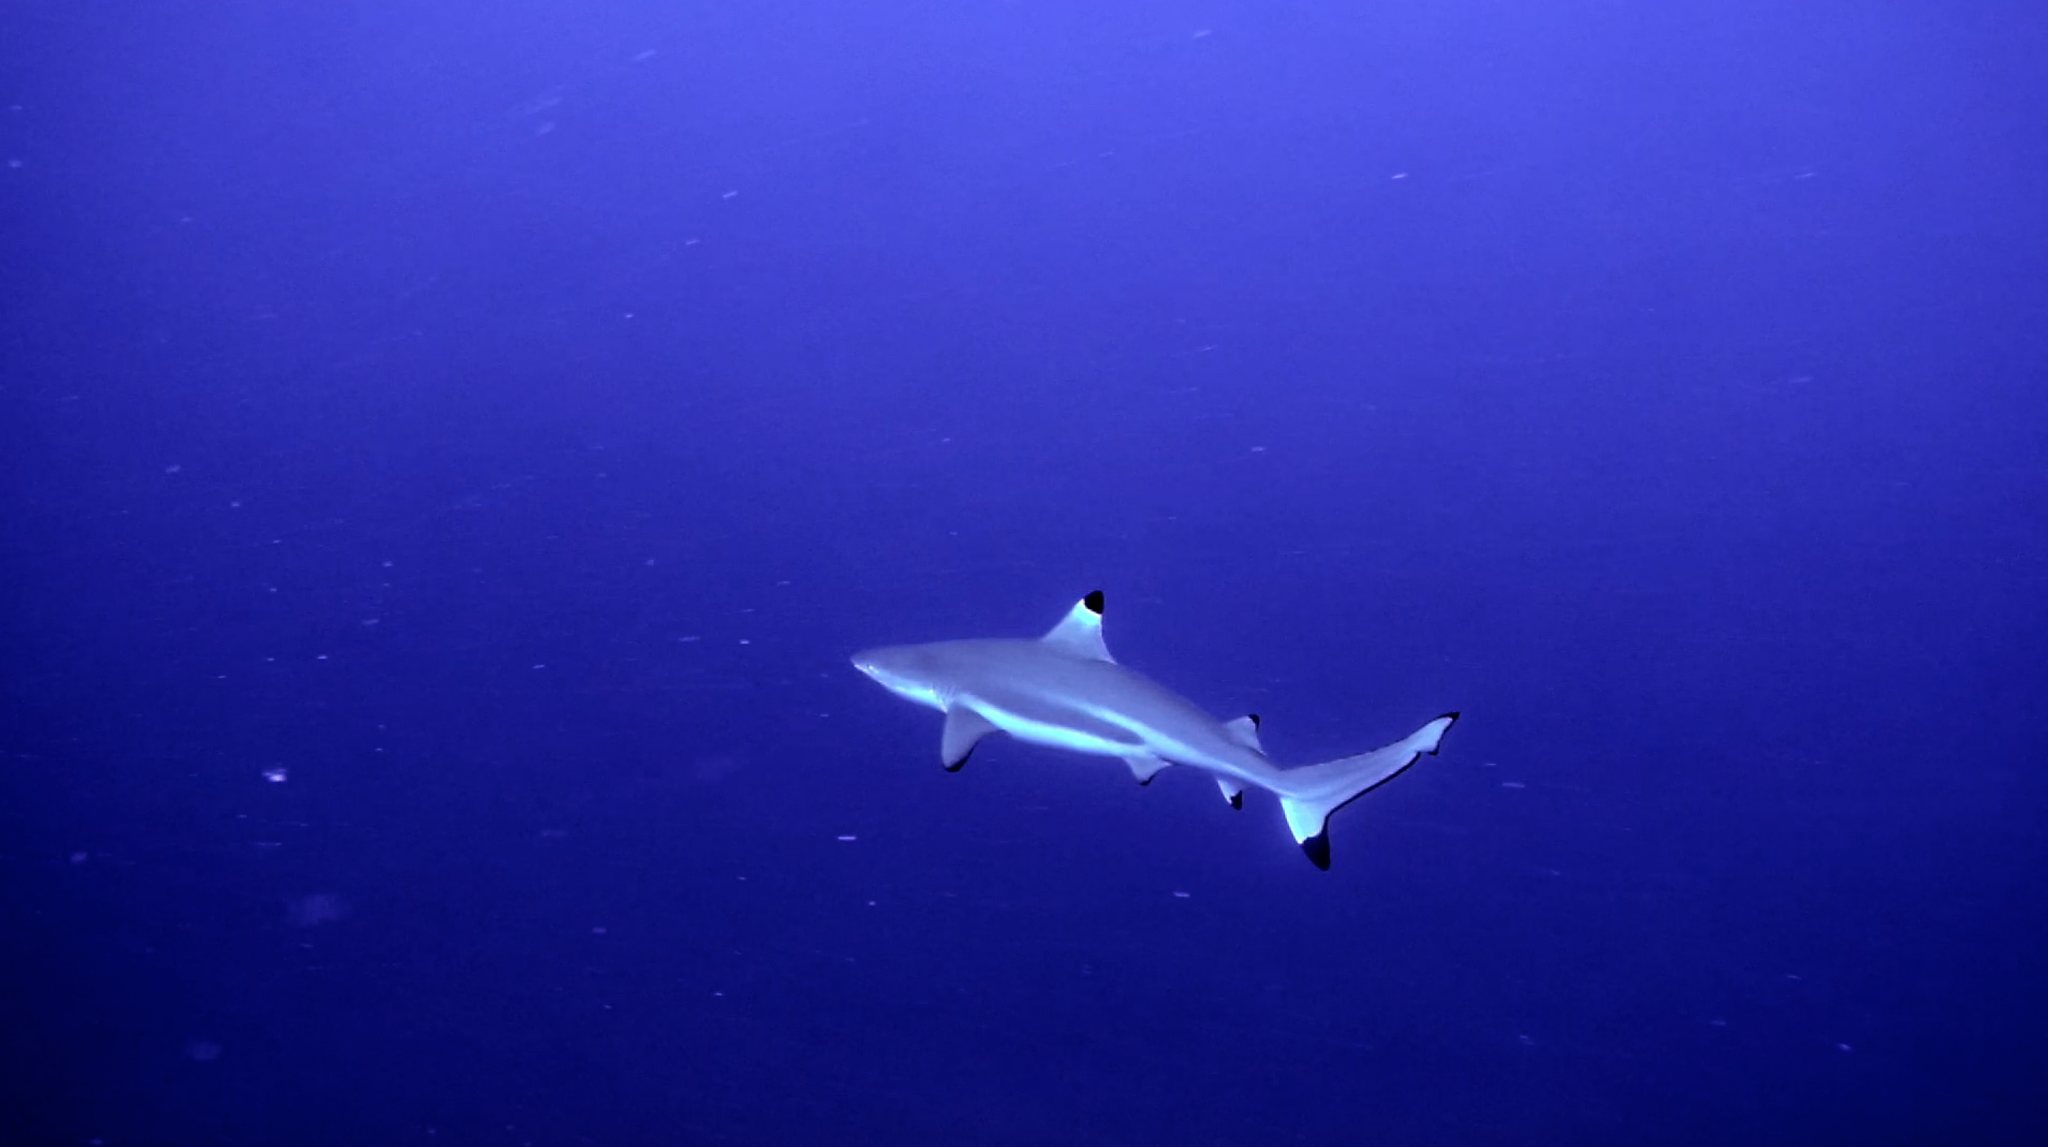
Above is a screenshot of a dive in Fiji shot using natural light at around 25m depth with clear visibility, no filter and edited in final cut pro to bring out shadows and highlights.
Hold it Steady
This is one of my cardinal rules when teaching videography. Hold the camera in your hand, control your buoyancy and keep it steady. Forget your head mount, chest mount, and leg mounted action camera mounts. They are great for snowboarding and surfing but not for scuba diving! You need to be in control of the camera to get good angles and keep the shots steady.
Take Short Clips
The average attention span of humans has somewhat deteriorated over the years to an average of just 8 seconds! So unless your clips are of incredible schools of hammerheads or whale sharks, I would suggest keeping short fast clips to keep your audience entertained.
Edit Like a Pro
After capturing the perfect underwater, surface, sky and even dialogue footage, many of us will forget about the footage and leave it sitting on our memory cards. Why? Probably because editing is very time consuming, we don’t have the knowledge of how to do it or we simply don’t know where to begin. Most action cameras will come with a form of editing software. I recommended using this software as it is generally fairly simple to use and later on when you become a pro you will use a higher end editing suite. The first edit will always take you the longest so don’t worry! In time you will gain more experience and start creating better videos.
So here are some tips to help:
- Download the footage onto your hard disk.
- Open your editing program.
- Enter the footage to a timeline.
- Start chopping up the footage into the best bits (be ruthless and cut out any bad footage).
- Find some music on a royalty free site (you might have to pay for this).
- Re-edit your footage to the music.
- Watch back and tweak your footage.
- Colour correct and stabilise.
- Upload and share your footage to Social Media.
So there we have it! These are just a few main principles and tips that I have used while shooting with an action camera underwater. While there are many different ways to capture the perfect underwater shot, with practice and experience you will become a pro (and addicted) in no time!
If you are interested in learning more about underwater photography, make sure you check out the PADI Peak Performance Buoyancy Specialty course, PADI Underwater Videographer Specialty course or the PADI Digital Underwater Photographer Specialty Course.